Alright, you’ve got your account up and running. There’s a new project you need to prep for, and you want to try out this Brainleaf thing.
But…how?
We get it. It can be a bit daunting. Especially if it’s your first time. But don’t worry. We’ve got this.
To start a new project, begin by navigating to the ‘Projects’ page. It’s easy to find – once you’re signed in, there are some tabs on the top-left of the page. You’ll find it there.
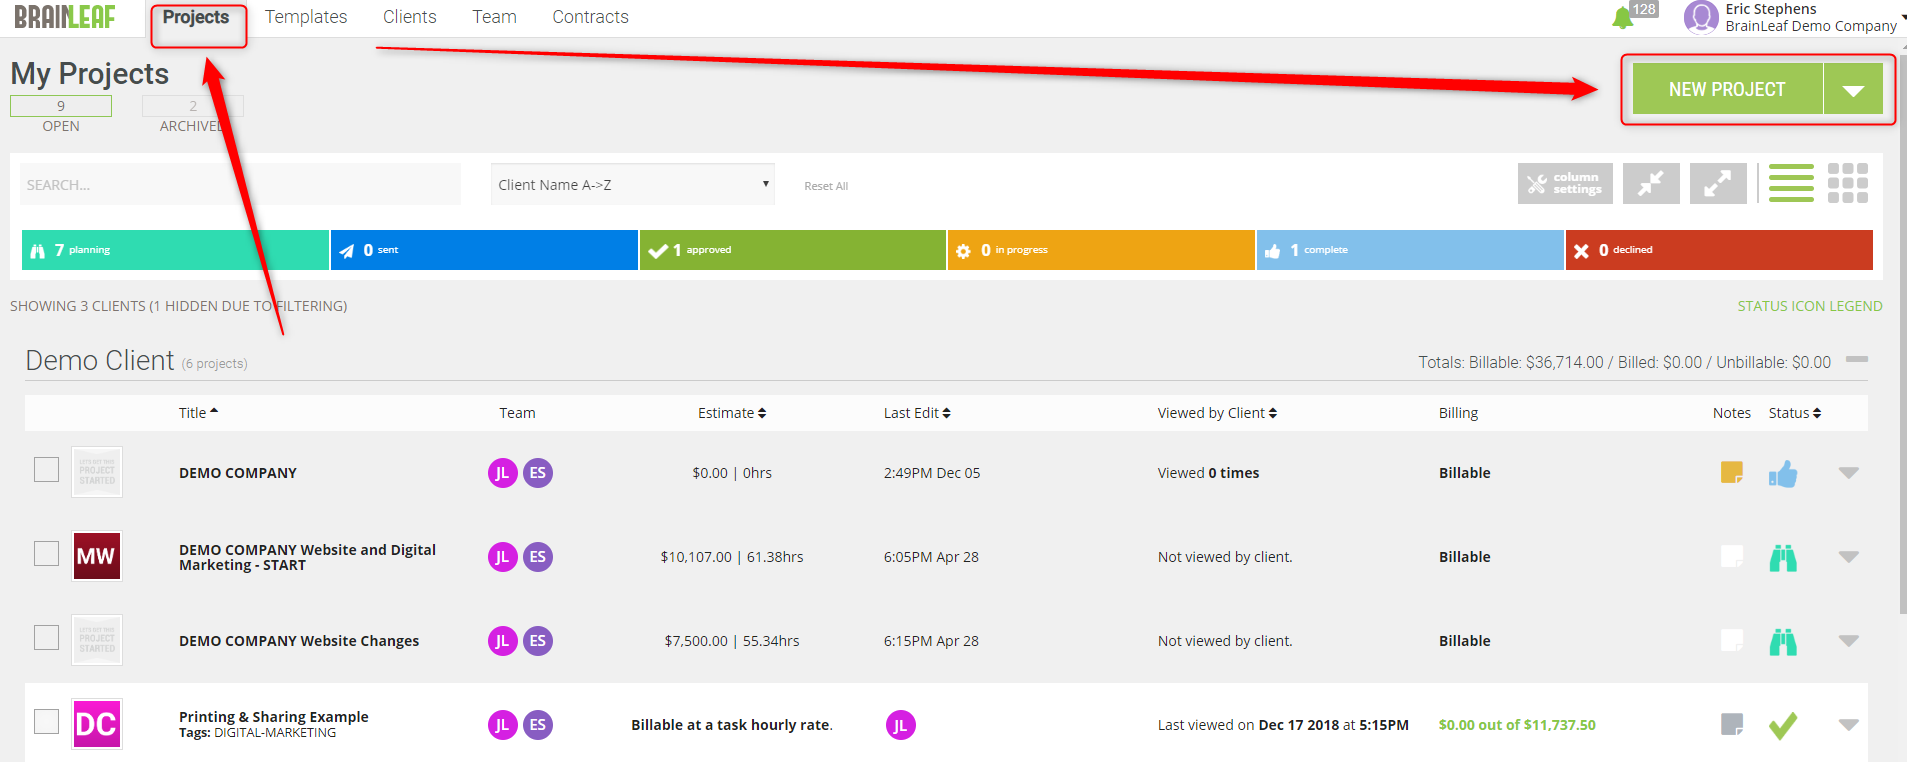
Then, when you’re on the Projects Page, there’s a big, green “New Project” button in the top-right. Click there when you’re ready.
Note that the drop-down arrow attached to the button displays the option to import a project.
When you click on the ‘New Project’ button, a lightbox will pop up to ask for some basic information about the new project.
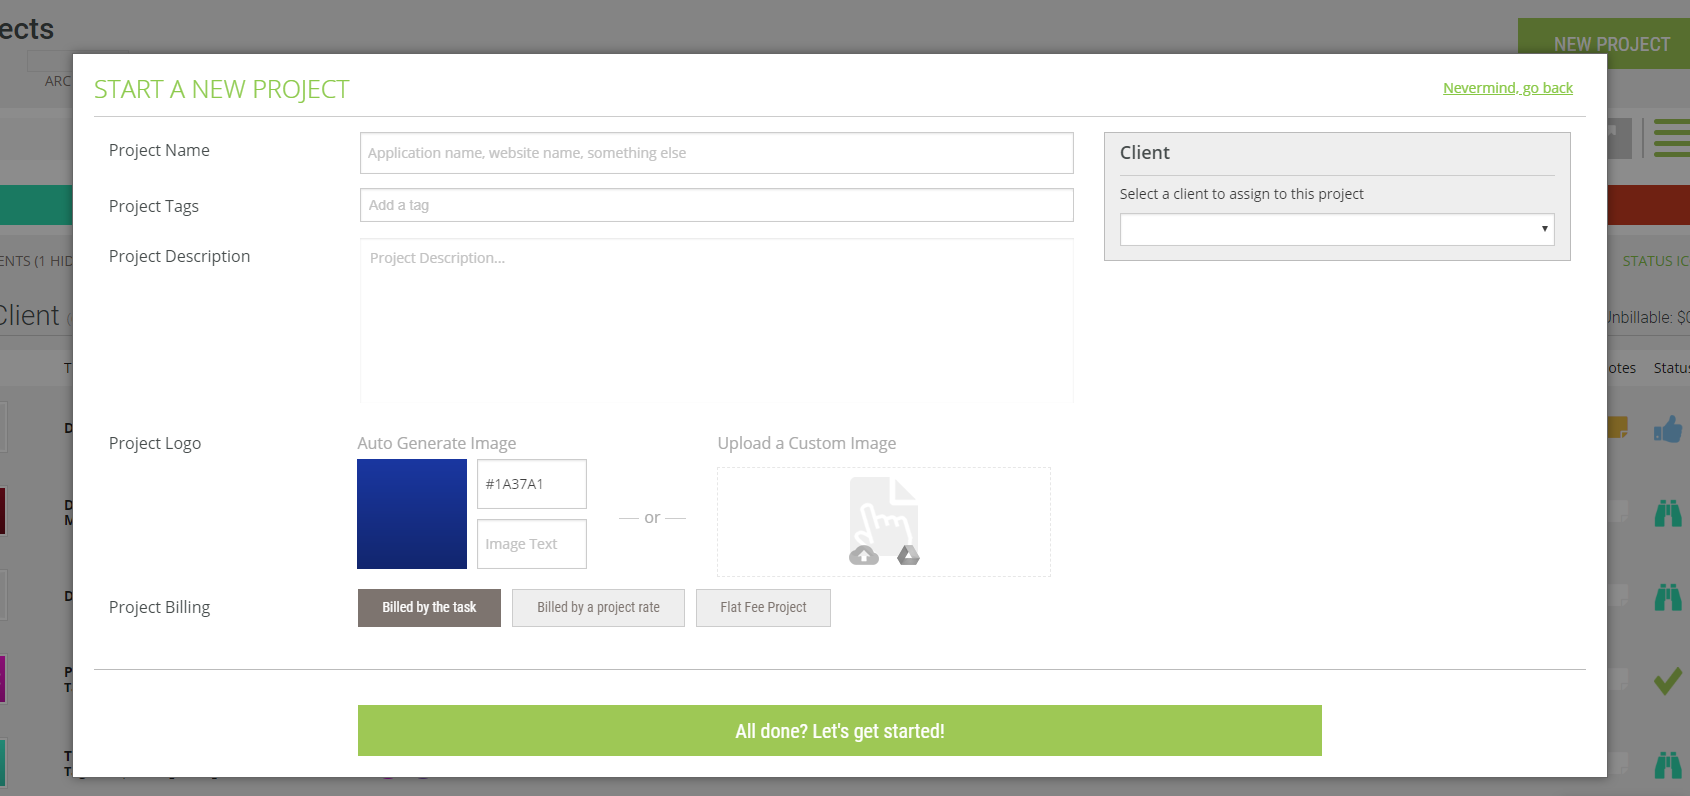
You’ll need to provide:
- Project Name
- Project Tags (these help to make projects searchable and filterable)
- A Description of the project
- The Client (if you don’t have any client profiles set up yet, there’s an option to add a new client which just needs their name)
- A logo (if you don’t have one, you can just choose a color and add a name or number to create a basic logo)
- Select a billing method
- By Task
- By Project Rate
- Flat Fee
Once you have all of that done, click the button to finalize, and the new, blank project will show. Now, all you have to do is flesh it out.
However, if your project aligns with one of our default templates, then it’s a piece of cake to just drag-and-drop a template into the navigation pane, which will fill the project with the template you insert to give you a better starting place.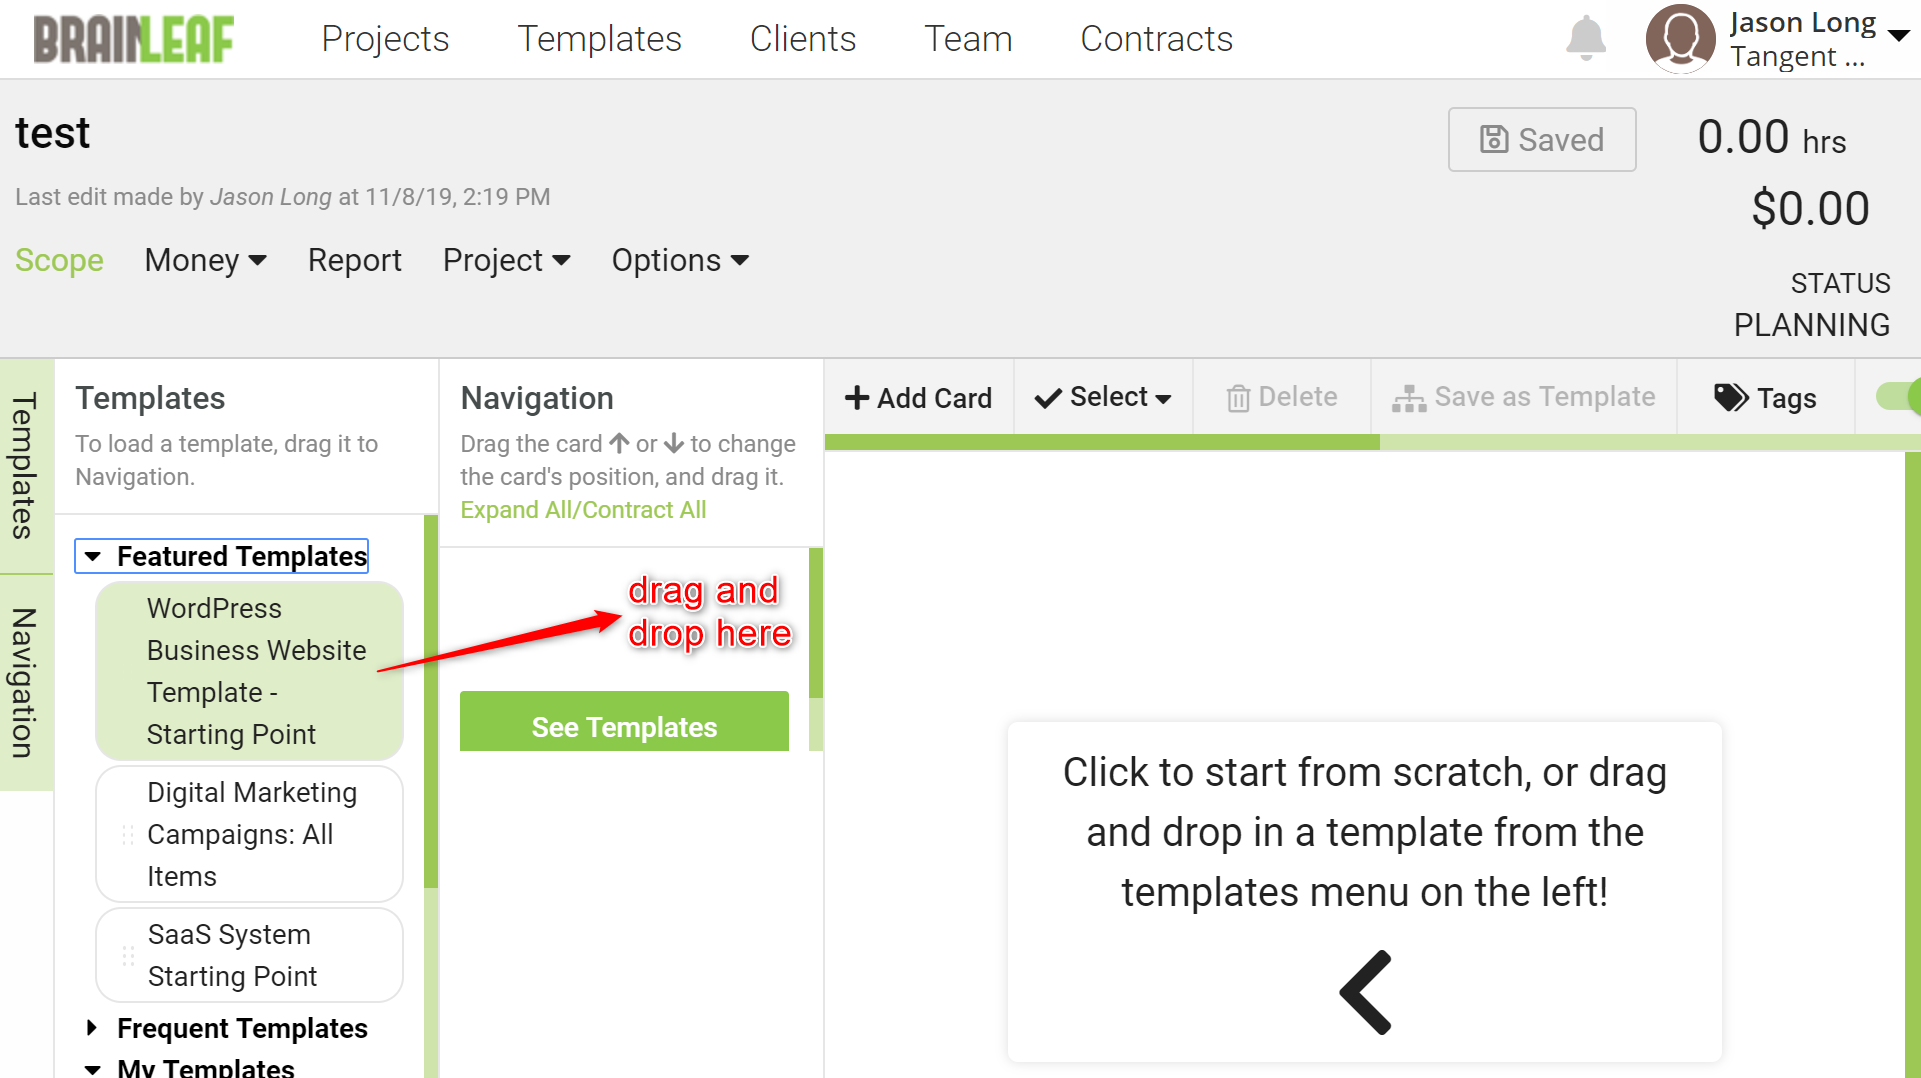
It may take a moment for the template to load after you drop it in, depending on the template, so don’t worry. And if you need a little help beyond this, just let us know!
Leave A Comment?