Unless today is your first day using a computer or smartphone, you’re familiar with drag-and-drop mechanics.
If today is your first day, you’ll get the hang of that tomorrow. It’s easier than remembering where the spacebar is, don’t worry.
Because it is such an easy, intuitive method of interface, drag-and-drop has been included as a base mechanic for rearranging your scope of work in brainleaf. And yes, it’s still super easy. Check the above video and the below screenshots for a quick tutorial.
First, you should know that there are two methods for dragging and dropping in the scope editor:
1 – Within the Navigation Pane
2 – Moving Templates into the Navigation Pane
First, allow me to give the basic reminder that the navigation pane is the little window on the left that looks kind of like a table of contents.
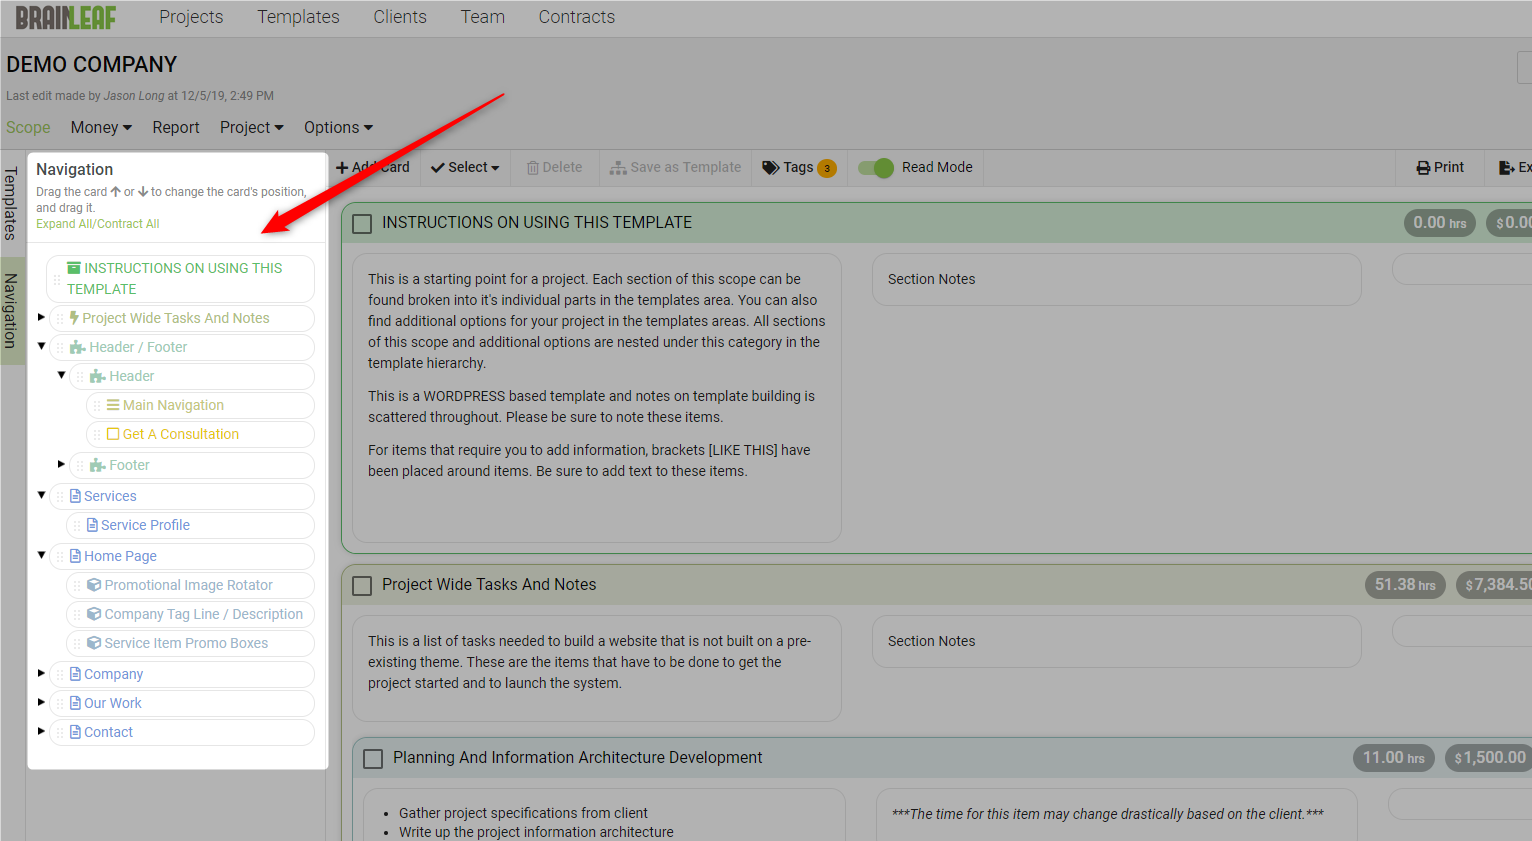
Within this section, you can easily reorder the document by clicking on an item and “holding” it as you use the mouse to move it to somewhere else in the document. The position change can be as small as changing the item’s level, such as moving it from the top level to being a subordinate task, or as large as moving an entire section of the project from the bottom of the list to the top in order to emphasize its importance. You can also move a subordinate card from one primary to another.
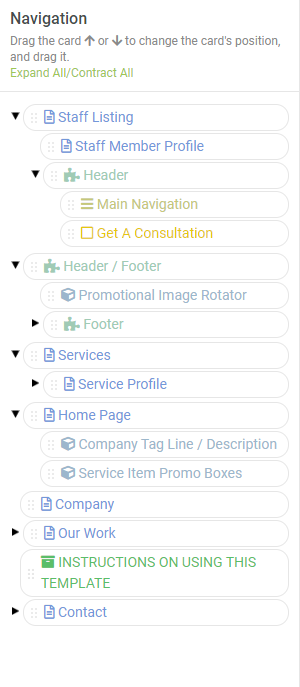
It’s also a really good way to frustrate your boss on April Fools’ Day, as I’ve demonstrated. Take a look at how things have been moved between the two images.
You didn’t get this idea from me.
The second way you can use drag-and-drop is for loading a template into a project. Simply open up the templates menu and the navigation pane on a new project, then drag a template into the navigation pane.
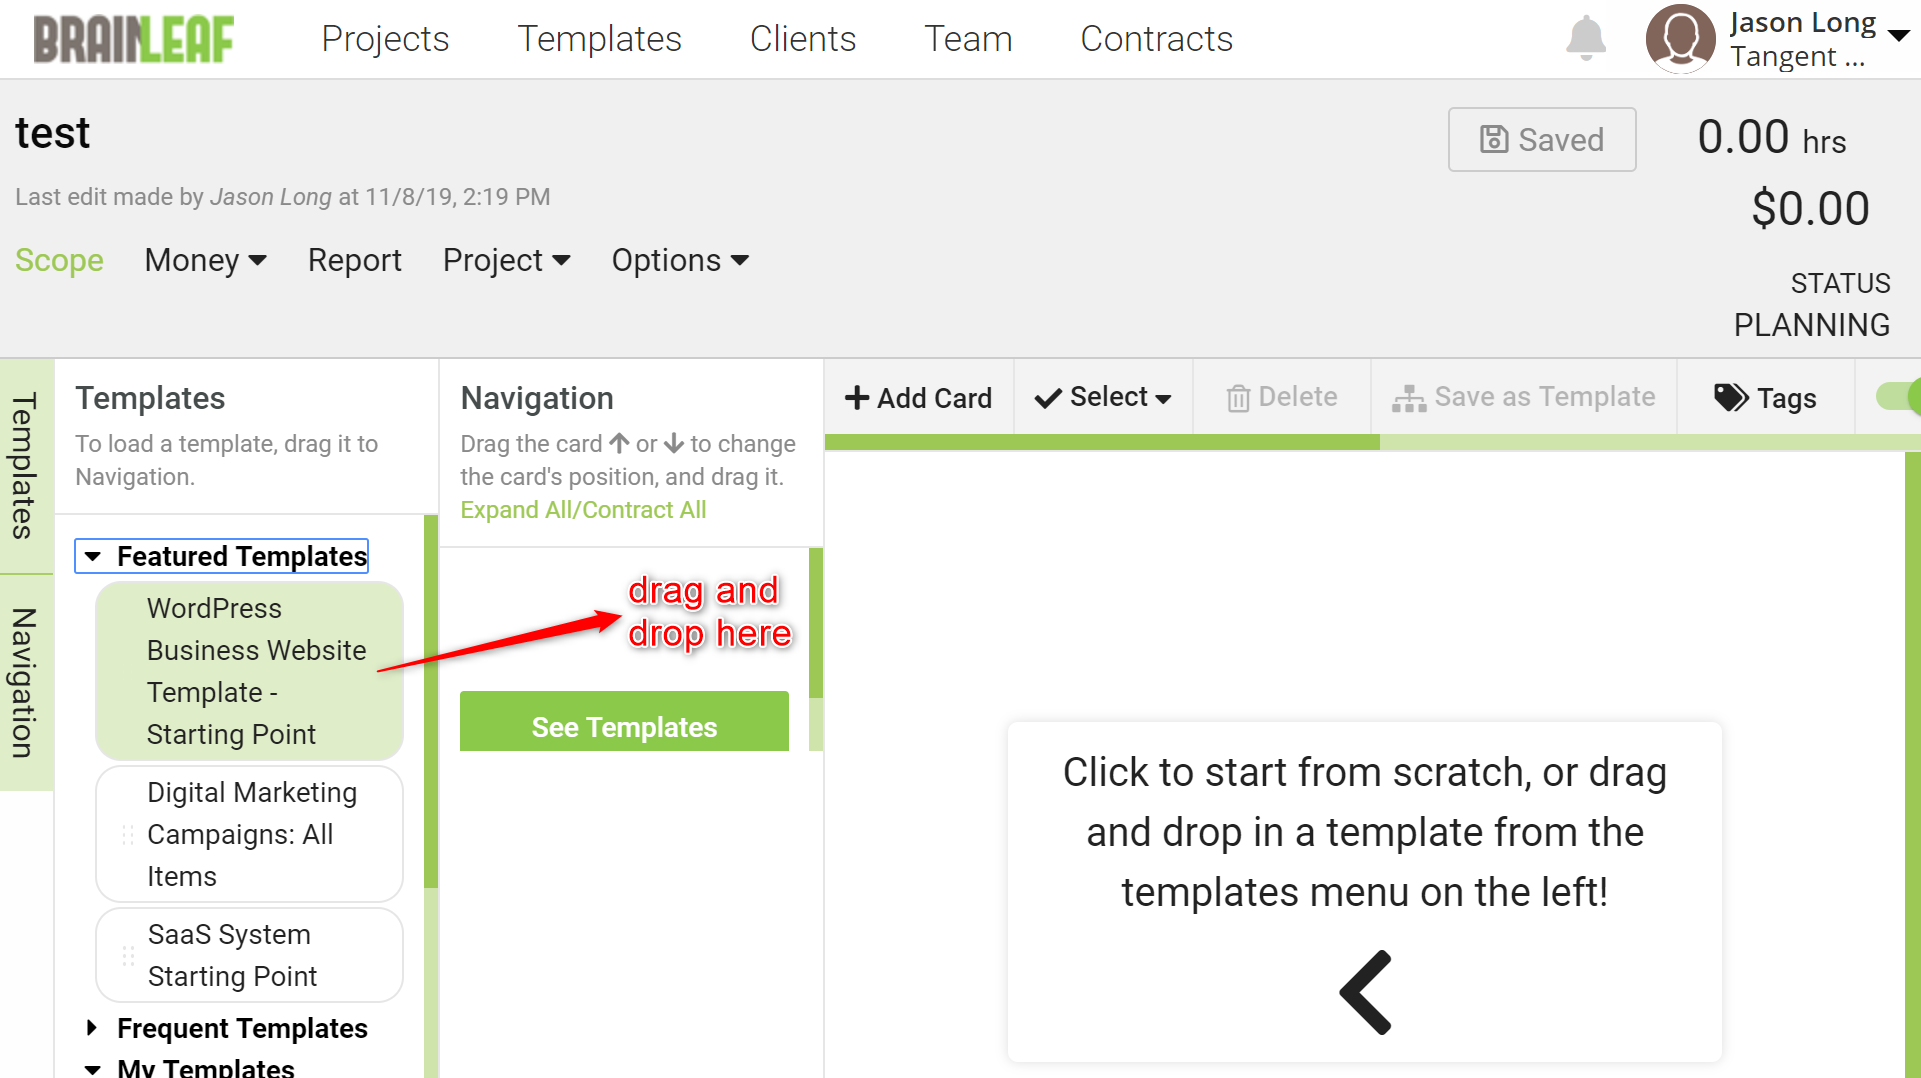
Now the project is prepped with a template.
Leave A Comment?