Get contracts signed on the fly! When was the last time you lost a project because you waited to send a contract? With Brainleaf, contracts can be auto-generated, prefilled with project info, and sent to your client for a digital signature in less than a minute.
Manage Your Contracts
Contracts are used during the Scope Approval Process, scroll down to the Contracts and Approval section of this article for that aspect.
Viewing, Editing, Adding, & Deleting Contracts
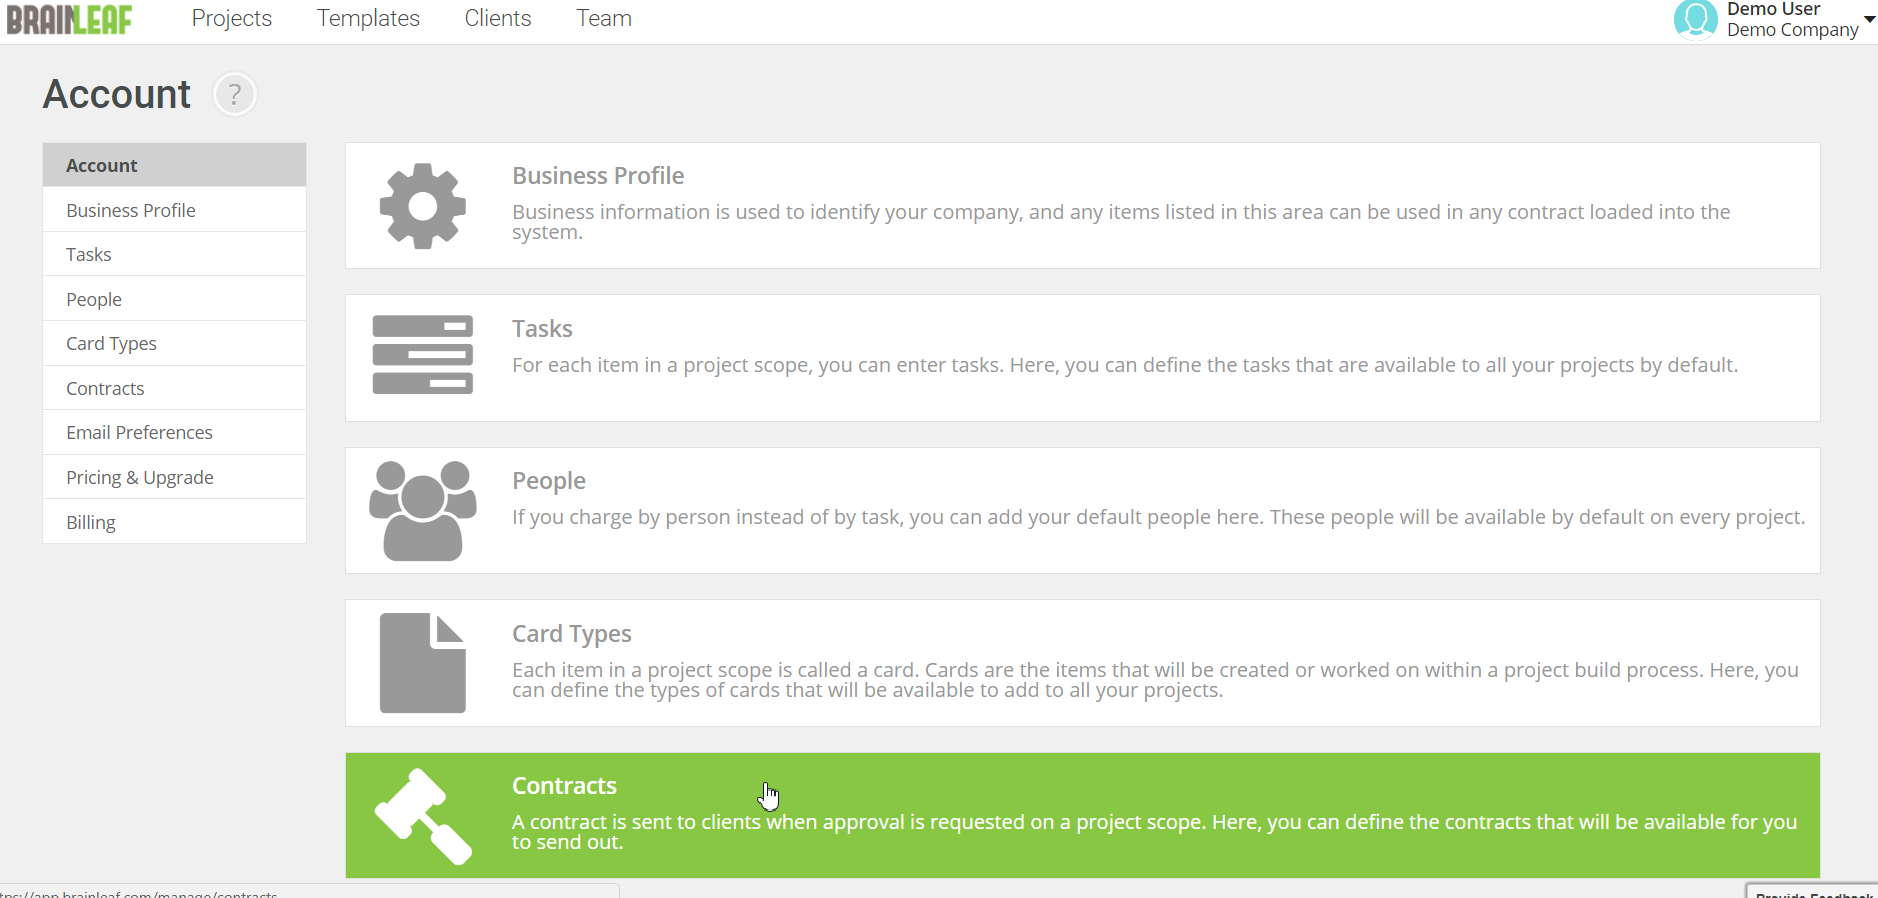
This is done in the Contracts area of the account.
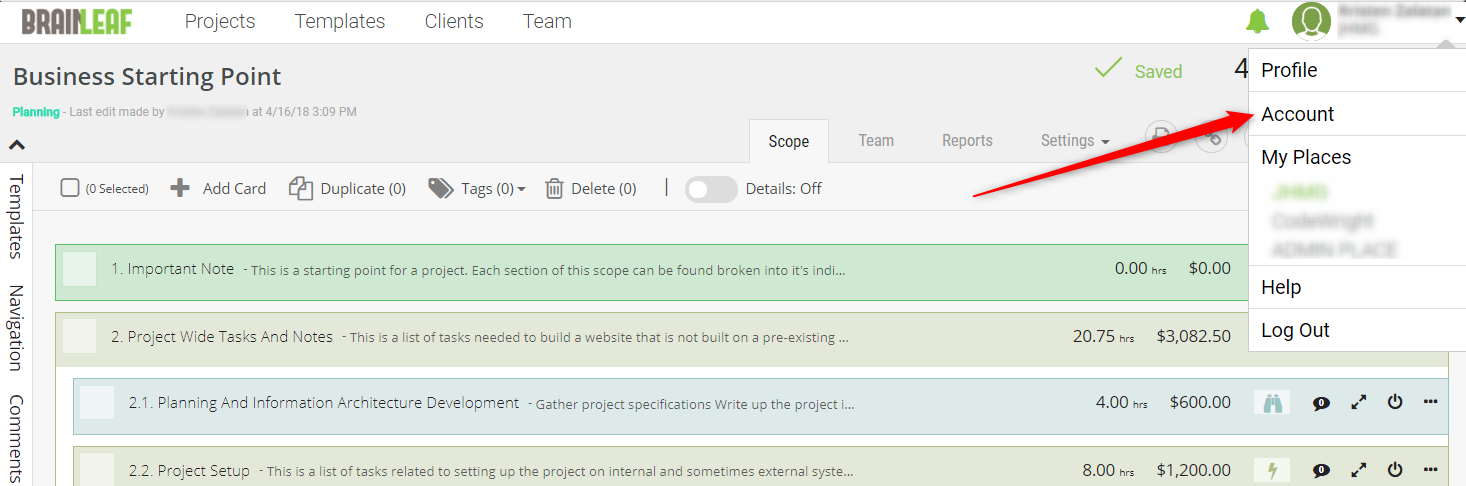
The contracts area is located under Account in the top right drop-down of any page.
There you will find contracts that we have pre-written for you which you can use ‘as-is’ or modify to suit your needs.
Remember: It’s always a good idea to have a lawyer look over any legally binding documents!
How to build your own contract
To add a new contract scroll to the bottom of the list and click ‘Add a New Contract’. There you can copy and paste a new contract to save to your account. Read on for more details.
Contracts in Brainleaf are made of:
- A contract Title: So you know which contract is which.
- A short contract description: So REALLY know which is which.
- Options to featured Payment Terms, Late Fees, and Retainage
- The actual contract document (text) and its placeholders.

Placeholders
In order to have a contract that you can reuse for different projects, placeholders are available when editing the contract, such as
- Client Name
- Your Business Name
- Your Business Address
- And lots more
Why Are Placeholders Awesome?
Using placeholders in your contract means you don’t have to enter data manually which means you can use your contract for multiple clients or projects without editing it.
These placeholders will automatically pull the information from various places in the system into the contract you are using for a project.
BUT, you need to designate what information will be pulled.
Placeholders must be added to the text in order to display in the contract you send to your client in the approval process.
For example: Even if you setup milestones during the approval process, if either the milestone placeholder, [MILESTONES_TABLE] or [DETAILED_MILESTONES] is not included in the copy of the contract, then it won’t display on what is sent to the client.
How To Add Placeholders
Let’s say your company is called Google, and you have a scope ready to send to your client John Doe. You want a few placeholders to be added to the contract automatically using placeholder text so your contract will read:
“You John Doe, located at 500 Street Drive, Athens GA, 30606 are hiring us, Google, located at 1600 Amphitheatre Parkway, Mountain View, CA 94043, United States, to design and develop a website for the total price of $10,000.00 as outlined in our Scope of Work which can be found here or attached with this contract.”
**Text in the above example shown in bold indicates information added by placeholders**
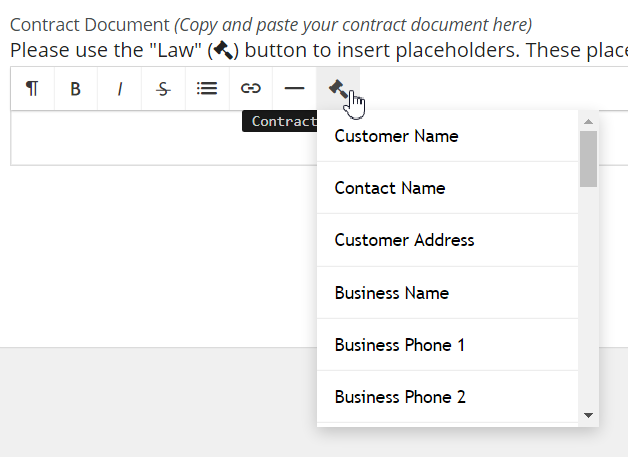
To add a placeholder click the hammer icon, and then select the item you’d like to add from the drop-down menu.
“You [CUSTOMER_NAME], located at [CUSTOMER_ADDRESS] are hiring us, [BUSINESS_NAME], located at [BUSINESS_ADDRESS_LINE1] [BUSINESS_ADDRESS_LINE2] [BUSINESS_CITY], [BUSINESS_STATE] to design and develop a website for the total price of [PROJECT_PRICE] as outlined in our Scope of Work which can be found here or attached with this contract.”
List of available Placeholders and the information they will display
- [CUSTOMER_NAME] the client name for your project
- [CONTACT_NAME] the client’s contact person name of your project
- [CUSTOMER_ADDRESS] the client address of your project
- [BUSINESS_NAME] your company name
- [BUSINESS_PHONE1] your phone number 1
- [BUSINESS_PHONE2] your phone number 2
- [BUSINESS_EMAIL] your email address
- [BUSINESS_FAX] your fax number
- [BUSINESS_ADDRESS_LINE1] line 1 of your address
- [BUSINESS_ADDRESS_LINE2] line 2 of your address
- [BUSINESS_CITY] the city of your address
- [BUSINESS_STATE] the state of your address
- [BUSINESS_ZIP] the ZIP code of your address
- [BUSINESS_DBA] your DBA
- [BUSINESS_TAX_ID] your Tax ID number
- [BUSINESS_DUNS] your DUNS number
- [PROJECT_LINK] link to access the project scope
- [PROJECT_PRICE] the total price of the project
- [PROJECT_TITLE] the project title
- [DATE_SENT] the date the scope is sent for approval
- [DATE_SIGNED] the date the scope is approved by the client
- [START_DATE] the start date of the first milestone
- [END_DATE] the end date of the last milestone.
- [PAYMENT_TERMS] the text entered in the contract by default, or the text added from the approval process
- [LATE_FEES] the text entered in the contract by default, or the text added from the approval process
- [RETAINAGE] the text entered in the contract by default, or the text added from the approval process
- [MILESTONES_TABLE] a table of all the milestones you will set during the approval process
- [DETAILED_MILESTONES] a detailed list of all the milestones you will set during the approval process
- [PROJECT_LABOR] the total cost of labor for the project
- [PROJECT_EXPENSES] the total amount of the expenses of the project
After making edits to your contract, be sure to preview your contract in the Approval Process so you can be sure your placeholders are filled with the right information.
Selecting a Contract: Step 2 of the Approval Process
BrainLeaf allows you to send out a contract and a scope of work in one process. Sweet!
To start the Approval Process click the Send For Approval button from you scope editor.

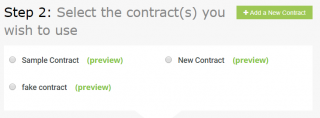
In Step 2 of the Approval Process, you can…
- Select a Contract by clicking the bubble to the left of the one you want.
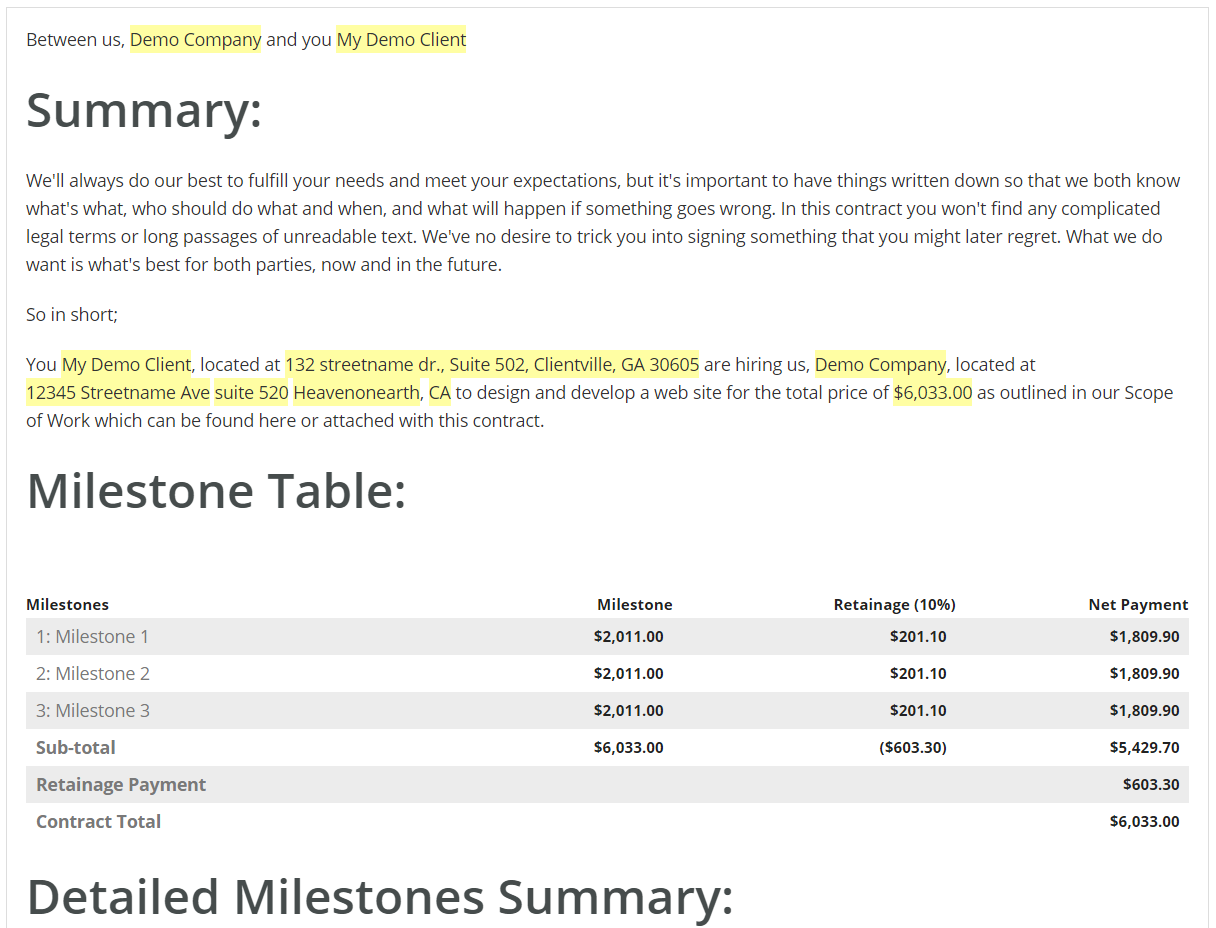
- Preview a Contract to see the placeholder information filled in (highlighted in yellow).
- Add a New Contract using the green button.
Important! ALWAYS preview your contract to check for any placeholders missing data.
If your contract includes placeholders that do not have data to pull from you will see an error message in red at the top of the preview.
**See “Troubleshooting” section below for a screenshot and information on how to resolve this.**
The placeholders from this specific project will be populated into the chosen contract.
Note that your contract in the account section won’t be changed, it only serves as a base for the one you are sending to the client.
Again, make sure to have the Milestone Placeholders in your contract if you want your client to see them!
Here is an example of a Contract Preview:
Troubleshooting Contracts
If you have a placeholder in your contract, but the corresponding data for the client or project is not available you might run into an error like this:
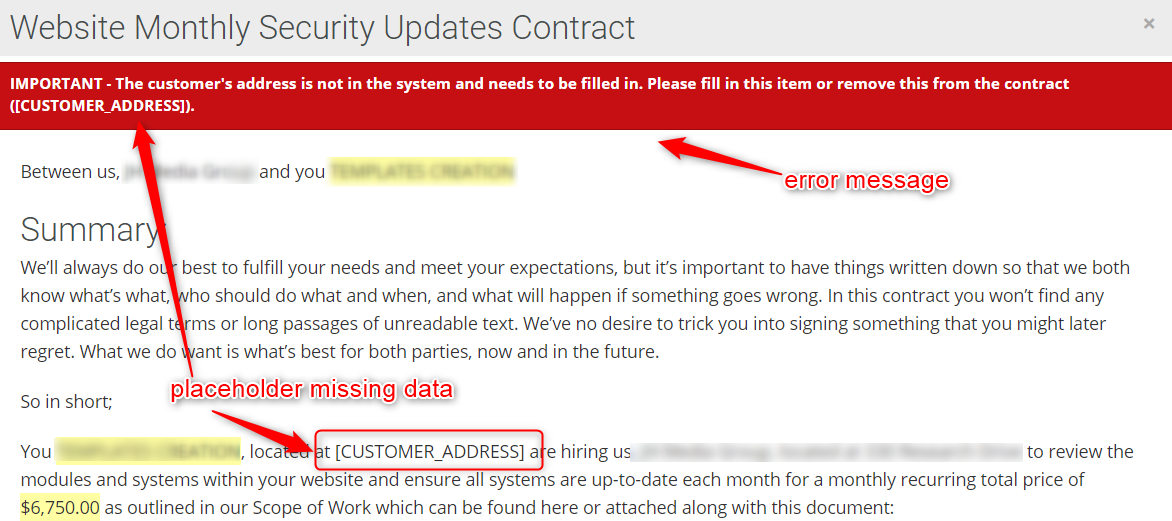
When this happens you will need to either add the required information to your project, client, or account OR edit your base contract to remove the placeholder. Here’s how to do each.
To remove the placeholder from your base contract
Scroll to the top if this article and read the Viewing, Editing, Adding, & Deleting Contracts section.
To add the missing data
You will need to determine where the specific placeholder pulls from using the list of all placeholders provided earlier in this article. You will then need to add the missing information. The following will help you find where to go to enter the data.
Data about your business can be edited by clicking
- Your name or image on the top right of any screen
- Account from the drop down
- Business Profile on the right sidebar
Data about your client can be edited by clicking
- Clients on the main navigation at the top of most any screen
- Edit or contacts to the right of your client’s name

Worried about milestone and payment details not pulling into your contract, don’t stress, we have another step for that!
In Step 3 of the Approval Process, you will Choose a Payment Structure which means it’s time to plan out when you’ll get those glorious chunks of change you’ve worked so hard for.
For help with Milestones or Payment Structure, see the link below
Related topic: Milestones: Benefits of Contract Milestone Management
Leave A Comment?