JIRA is one of the leading Project Management software systems on the market, which made integrating it into Brainleaf a, HEH, no-brainer.
So, if you use JIRA, we’ve made it easy to export your entire scope of work over when you transition from scoping to working. And the process only takes a few minutes – though it will, of course, take longer the first time since you’ll be referring back to this step-by-step guide and learning the ropes.
Step 1: Starting the Export
Whether you’re exporting to JIRA or another system, your first step will always be the same. Near the top of the screen, there’s an export button. Check the below screenshot.
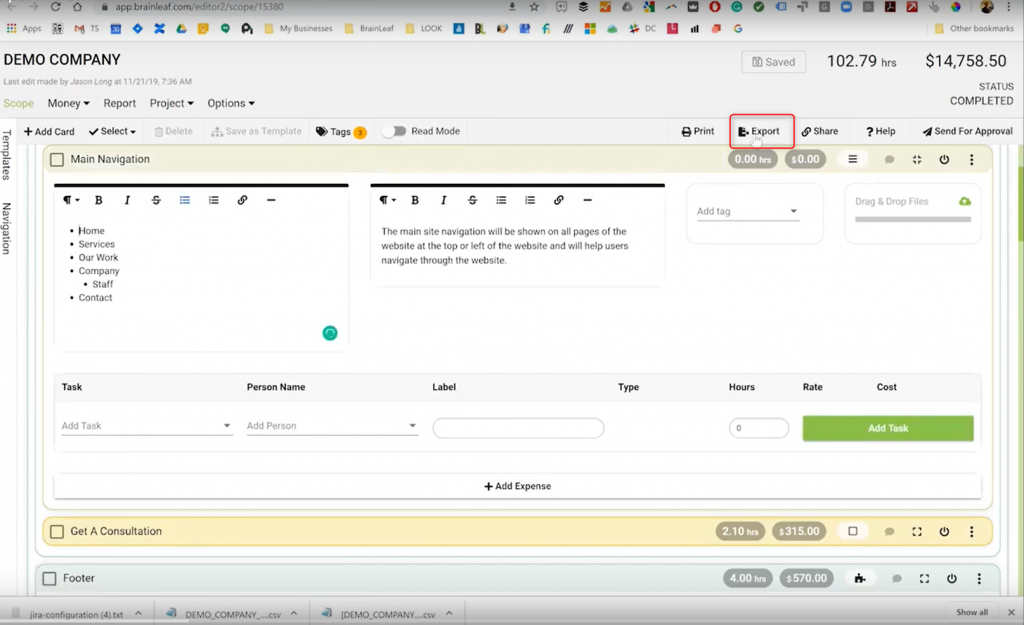
From here, just select export to JIRA.
Step 2: Selecting Export Type
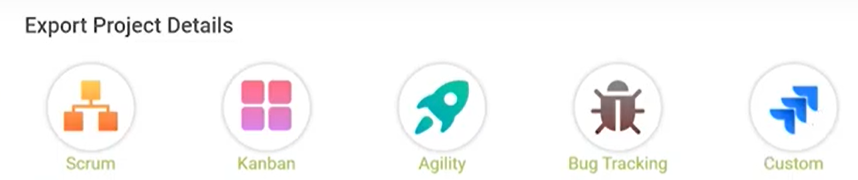
As you know, JIRA is a robust system and has a lot of ways of managing projects. These include Scrum, Kanban, Agility, Bug Tracking, and, of course, you can also set a custom implementation.
Step 3: Card/Task Selection
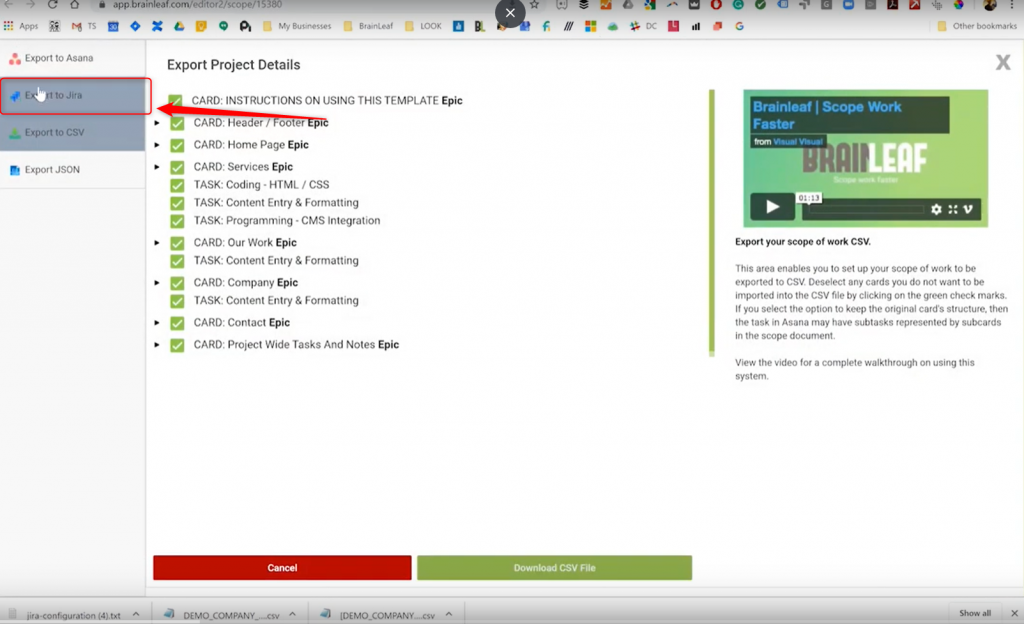
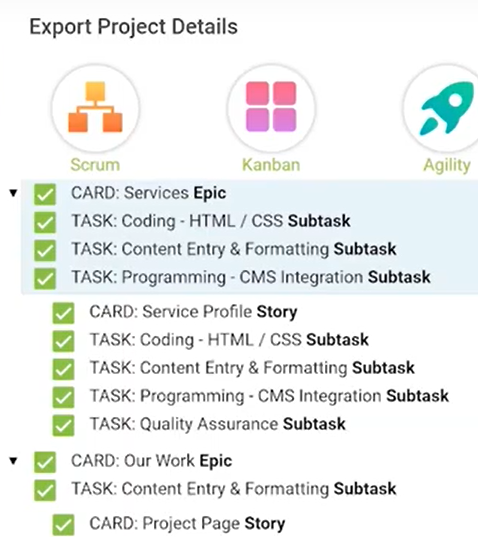
The next thing you’ll be asked is to clarify which elements on the project you want to export. You may want to segment the project in JIRA through separate exports, or you may just want to exclude a particular section that you believe has no bearing on the individuals who will be utilizing that program.
So, here, you would deselect any cards or tasks that you do not wish to include. So for example, if I don’t want the services section of this website, then I might deselect services and all of the items underneath.
Next, we’re going to click on the download JIRA files button at the bottom of the page.
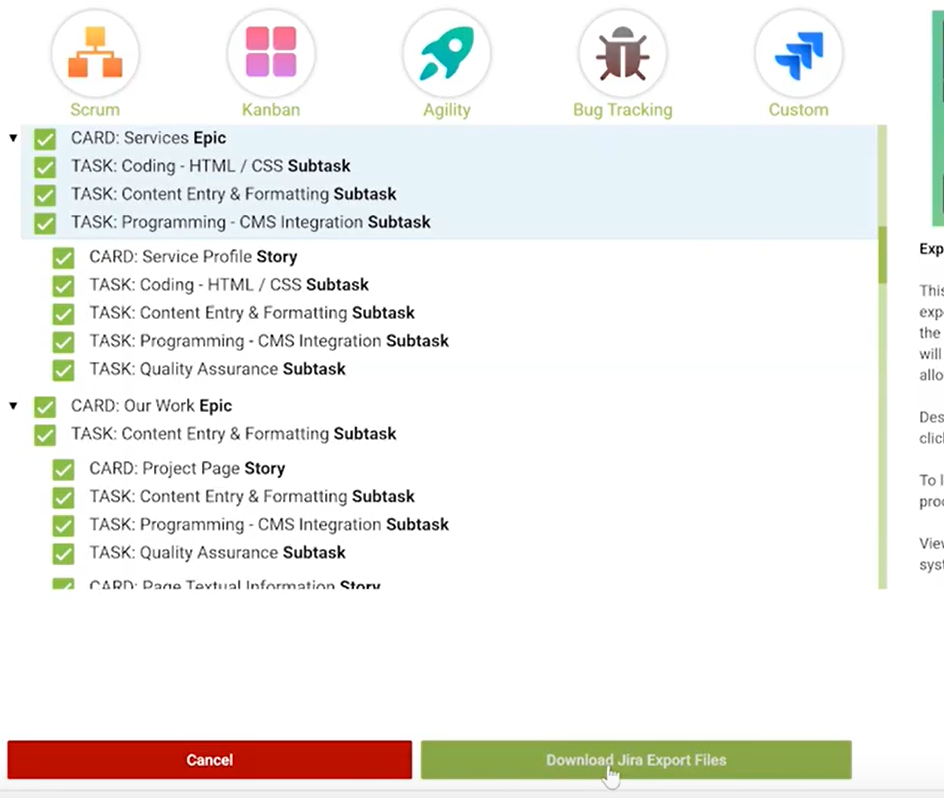
And you can see we just downloaded this company demo CSV AND the JIRA configuration file (number four because our CEO is very emphatic in making certain everything works before he shows anything off). That’s two files – one .csv and one .txt.

Step 4: Starting the Import into JIRA
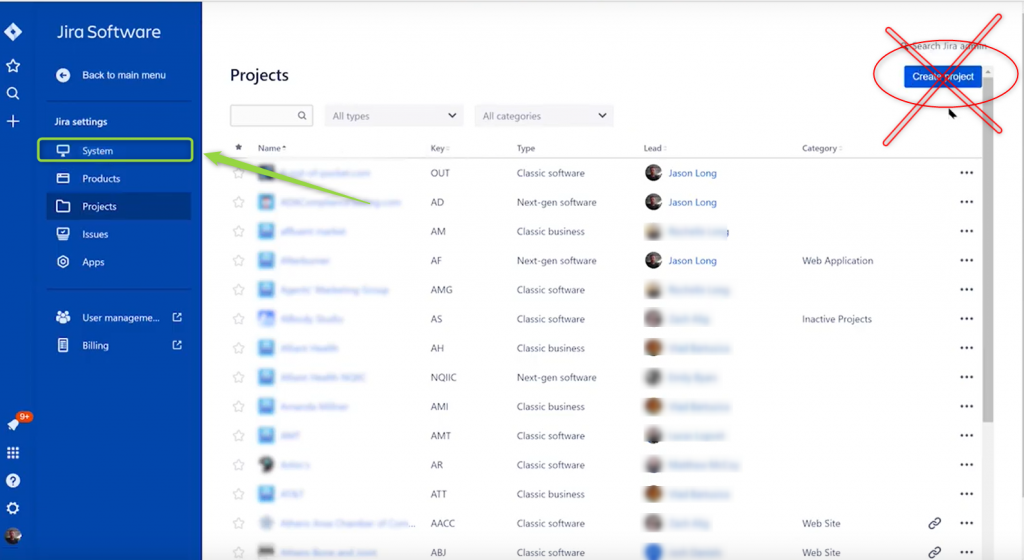
The export is done! Now, you need to open up JIRA to start the import.
Normally, you would click on the ‘Create Project’ button, but that doesn’t work for imports. Instead, click on the ‘System’ button under ‘Jira Settings’ on the left.
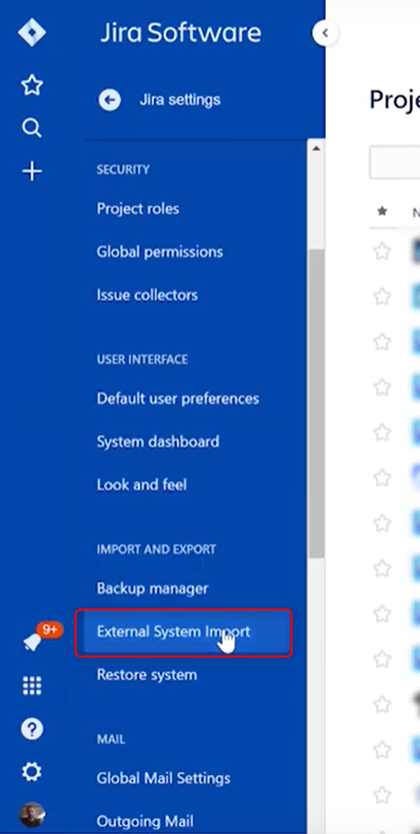
And then on “External System Import”.
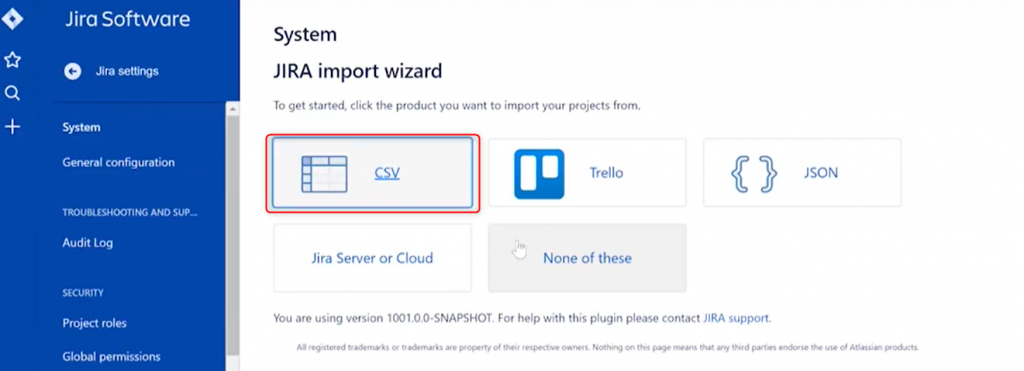
Step 5: Selecting the File to Import
This likely doesn’t need to be a separate step, but it helps to break up the series of screenshots and help you keep your place.
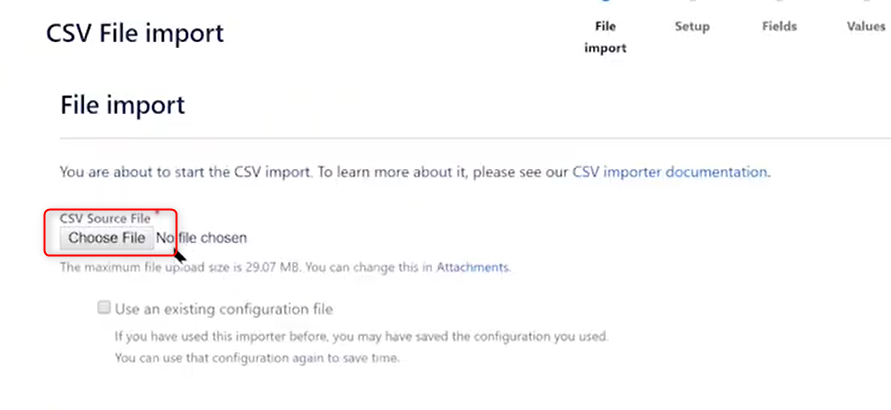
So, next, click on CSV.
“Choose File”, of course. You weren’t born yesterday. And then select the .csv file you just downloaded.
In the screen below, you can see a .csv source file has been selected, but now you’ll need to click on “Choose File” again under ‘Configuration’. Now, you’ll need to select the .txt file you just downloaded.
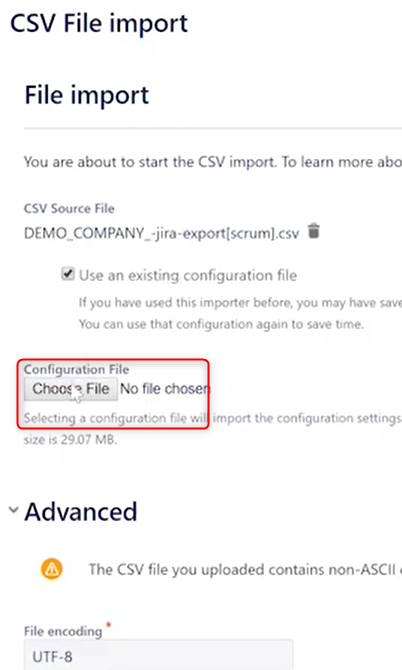
When you’re done with that, click the ‘Next’ button at the bottom to move on to the Setup phase.
Step 6: Setting Up The New Project
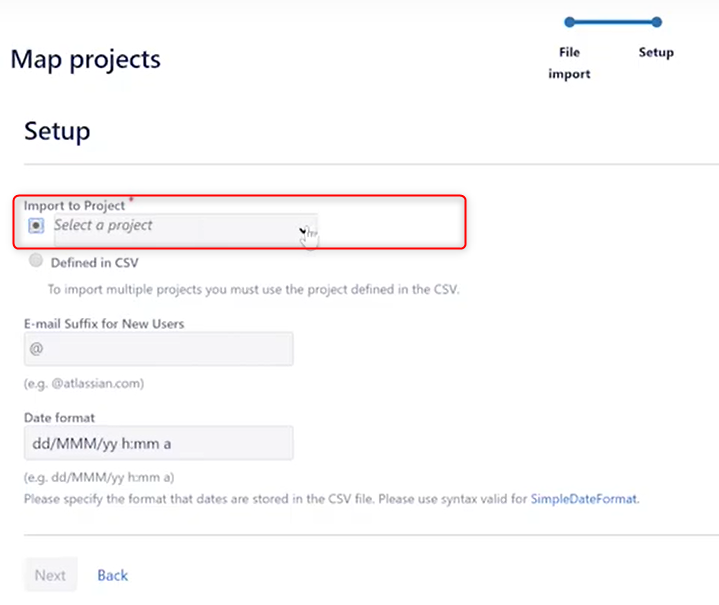
The files are set, so now you have to create a project for JIRA to migrate the data into.
First, click the dropdown to select a project type.
This is where your previous selection of Scrum/Kanban/Agility/etc comes back around. The export needs to match the import. Select the same type here that you selected for the export. For our demo video, we used Scrum, which is why that’s highlighted here.
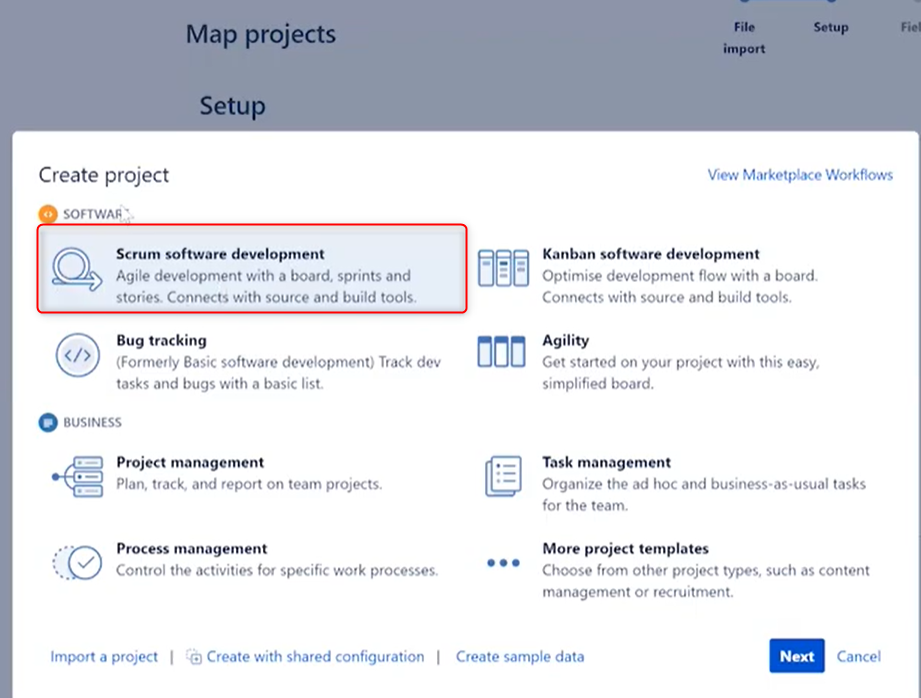
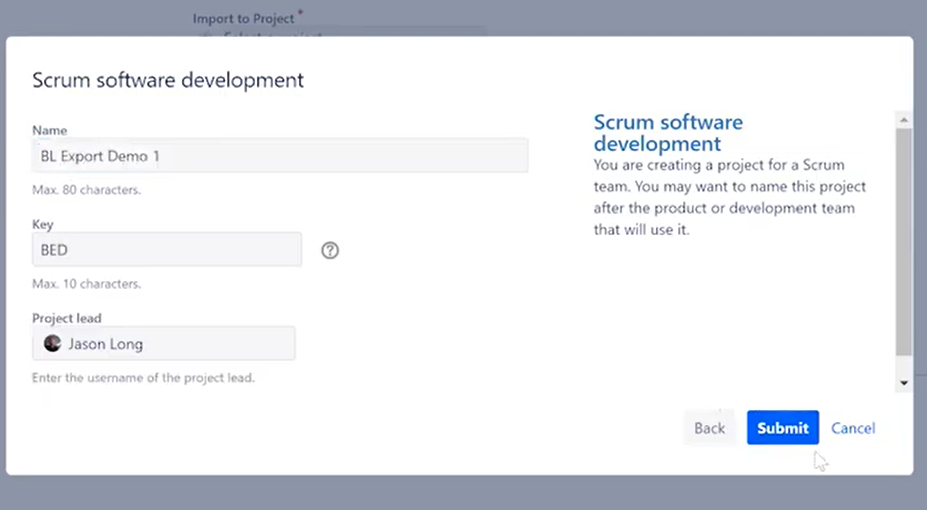
Now, give it a name. Tweak who the lead is, if you need. And click ‘Submit’.
Step 7: Mapping
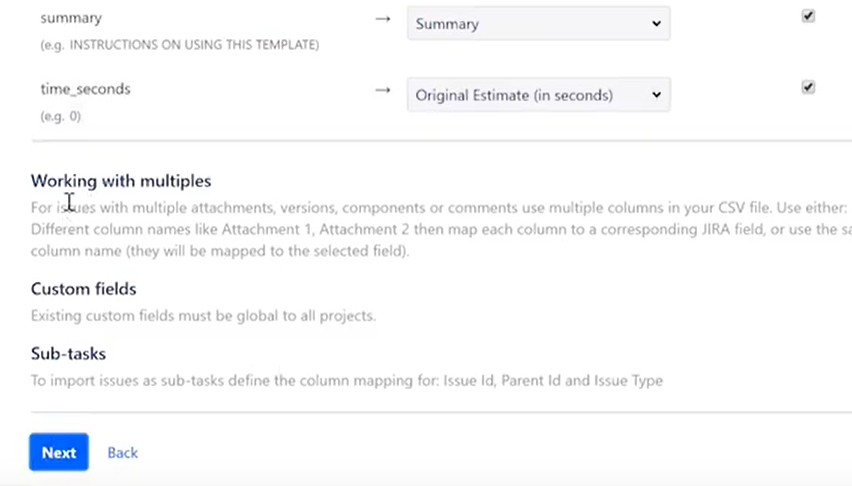
The new project is created, so now you just need to glance through the mapping to ensure everything imports correctly, as you want it. There shouldn’t be much that you have to do here. Note, however, that your estimates in Brainleaf will convert to seconds, as that’s what JIRA requires.
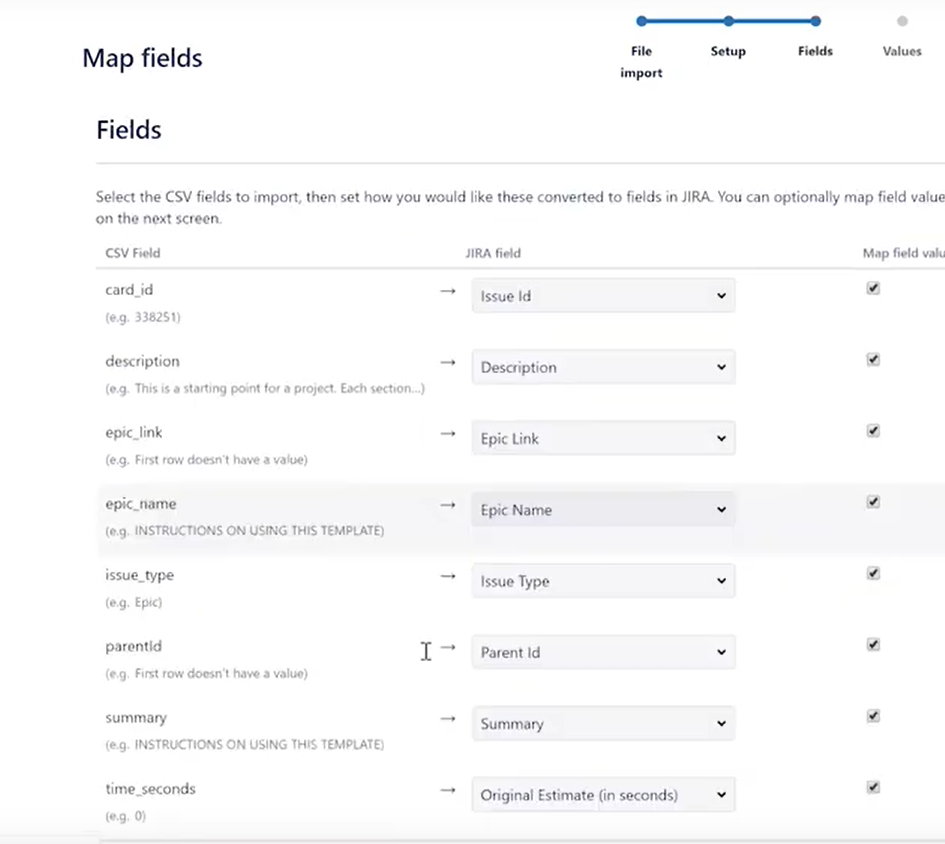
Click ‘Next’ when you’re ready.
Step 8: Confirm and Begin Import
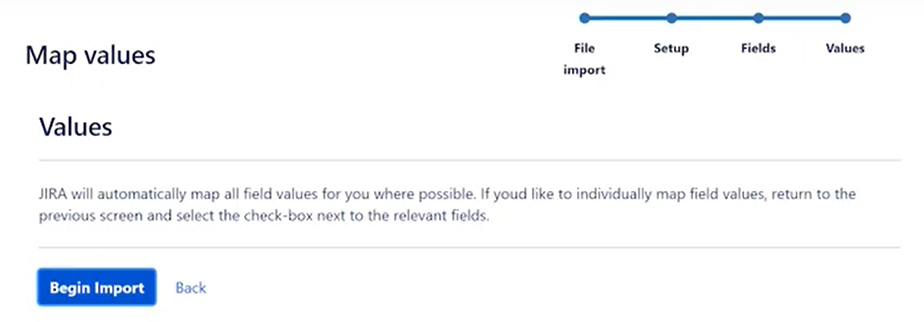
The fourth page of the Import process asks you to confirm that you’re happy with your mapping and gives you an option to go back. Thanks, JIRA!
Click ‘Begin Import’ when you’re certain there are no changes you want to make.
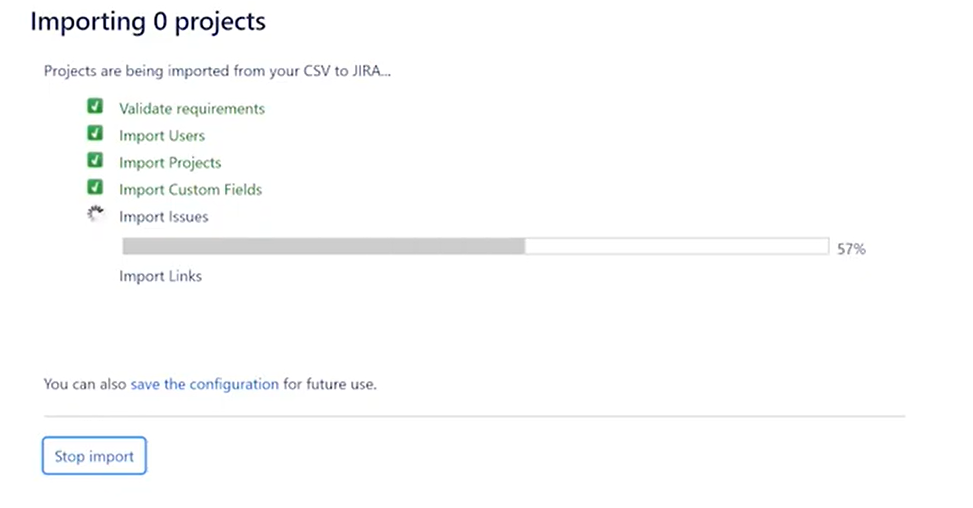
Step 9: Grab Some Coffee
No, really. Now you’re just letting the program run. This can take anywhere from a few seconds to a few minutes. Go ahead and assume you have time for a quick break.
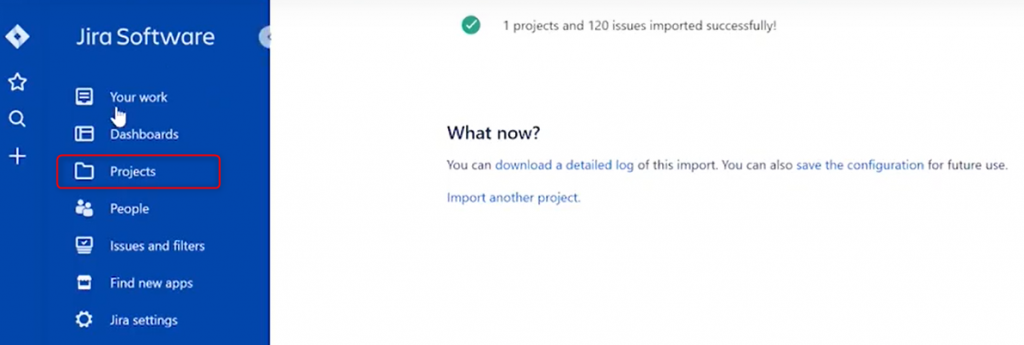
Step 10: Success!
Oh look! Instead of seeing how dizzy you can get in your spinny chair, you’ve returned from stretching your legs and grabbing much-needed caffeine to find that the success screen was JUST POPPING UP.
Good timing!

Step 11: Find Your Project
Everything should be good-to-go now. But it’s always best to double-check things (seriously, please let us know if you spot any bugs or odd tendencies during your conversion; we want this to be flawless for you).
So, click on ‘Projects’.
And find the new one you just imported. If you squint really hard, you’ll see the middle one in this screenshot is the “BL Export Demo 1” project we made that one of our pieces of security software decided to blur.
If only I’d had that enabled for Game of Thrones spoilers during the last season…

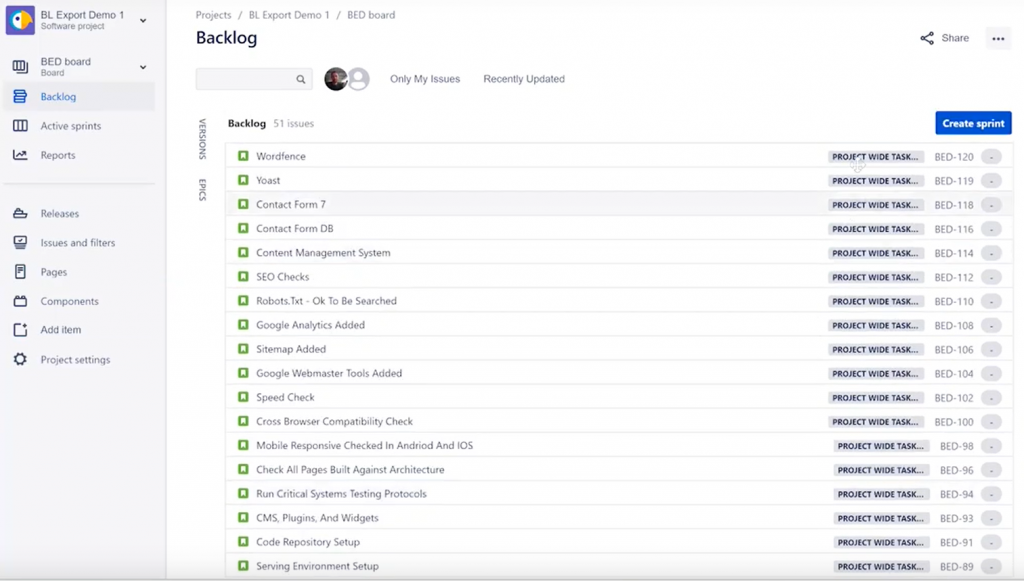
Step 12: Review
Voila! There’s the project at Macro scale – all of the stories and the epics assigned to them.
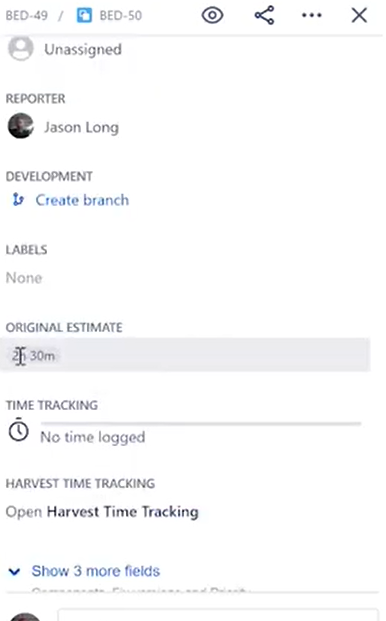
Taking a closer look at one – ‘Staff Listing’, for example, shows that the description and subtasks were translated okay in our Demo.
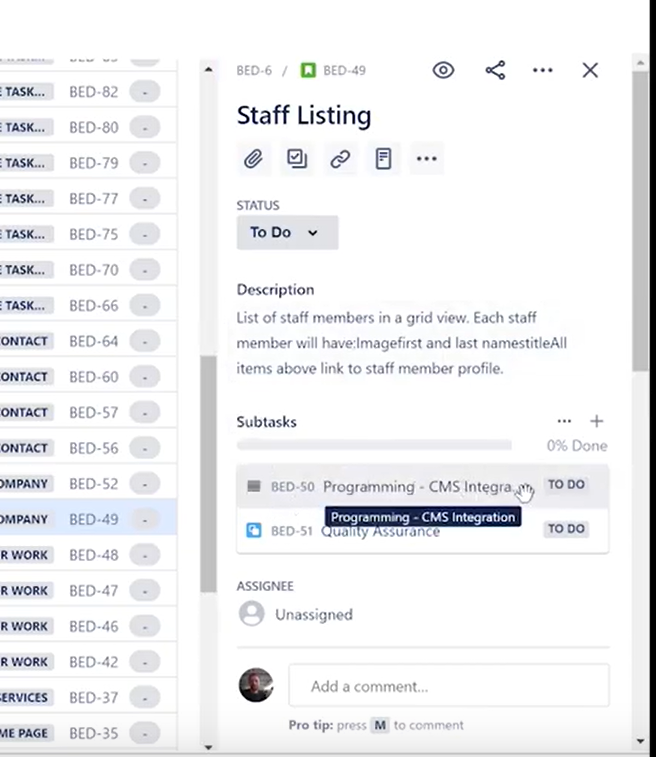
We can see that this task is unassigned and we have no story points and no original time just for the top level items, only for the sub tasks.
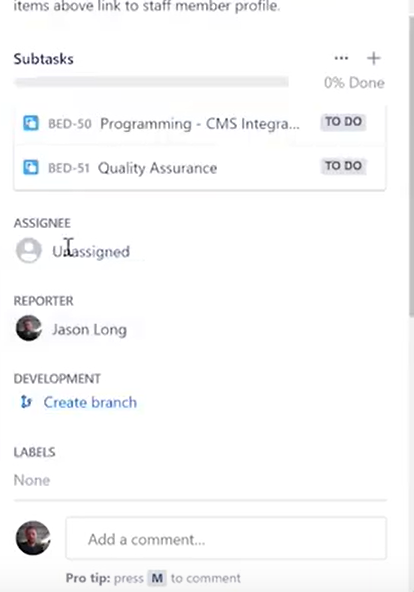
Note that at JH Media Group, we use Harvest for our time tracking. So you can see a Harvest button in this screen, but this will not normally be there unless you have the Harvest plugin implemented.
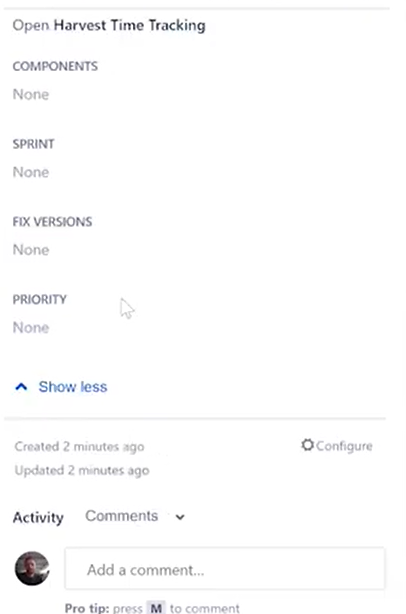
You can also click on the highlighted section for more fields.
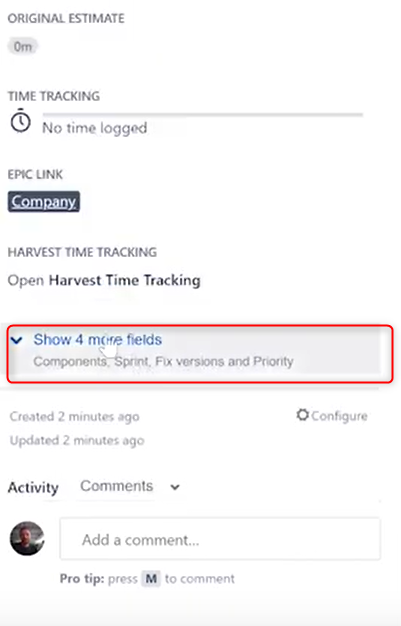
But, as you can see, they’re currently empty.
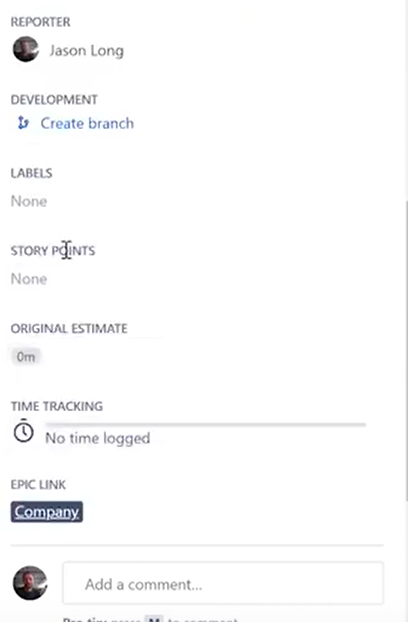
Going back and looking at the CMS Integration subtask, we can see who the assignees and reporters are, plus labels and story points.
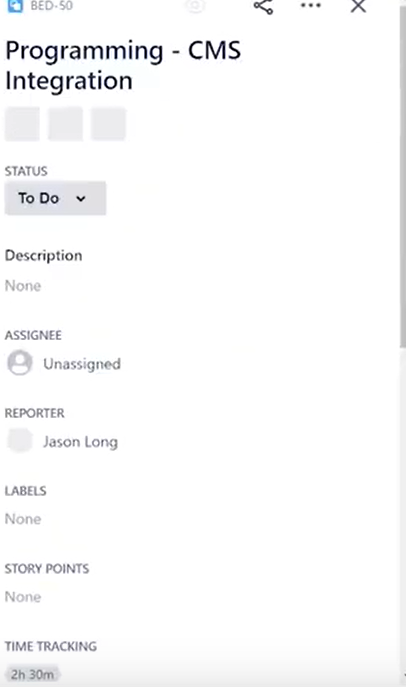
And we’ve got 2 hours and 30 minutes assigned to this particular item. So whenever someone is time tracking, if they were to click on time tracking here or log time within JIRA, it would log against this original estimate, which helps you to see and understand how accurate your original estimates are.
Which is helpful because it helps you learn to make better estimates.
The only thing left to do in this project would be to set up timelines, assign people, and start a new sprint.
We hope this guide was helpful and, as always, please let us know if you have any questions or if anything is unclear.
Leave A Comment?